Introducing the Christmas Tree Red Rods Extension
Each Montessori material isolates one particular skill, and the material’s purpose often correlates with other Montessori activities. This means that there are endless extensions students can embrace once they have mastered the original concept!
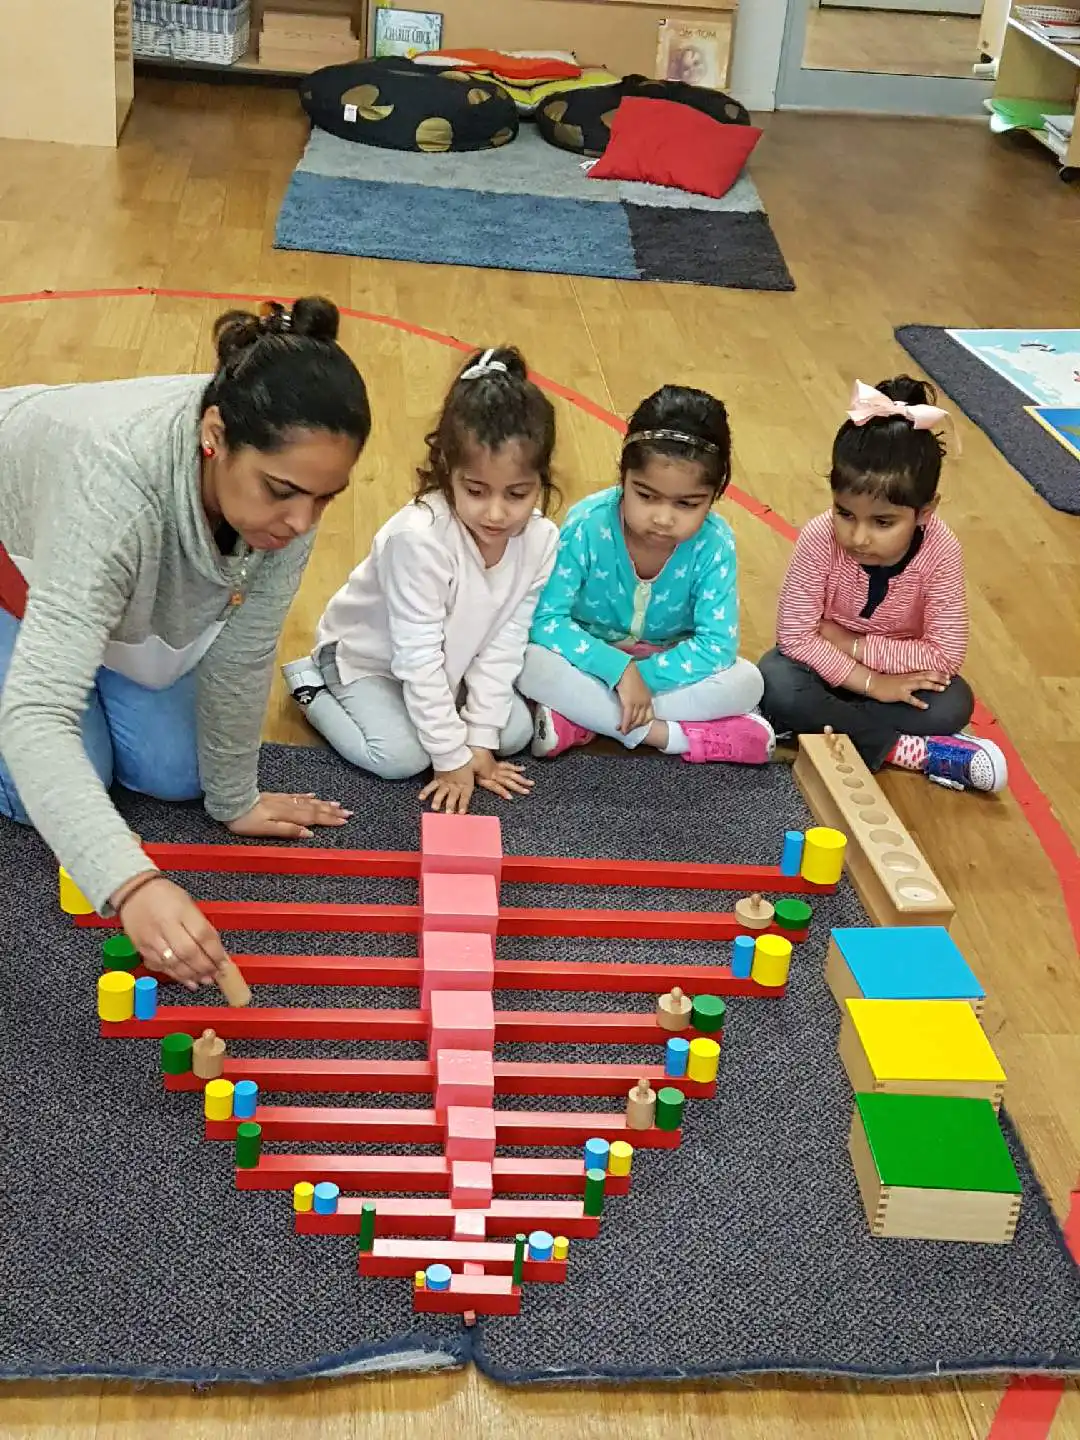
With Christmas fast approaching, each Montessori Academy campus has been participating in festive material extensions during the Montessori work cycle.
The Christmas Tree Red Rods extension is a popular activity amongst Montessori Academy students. This activity engages with key Montessori Sensorial materials including the Red Rods, Pink Tower, Knobbed Cylinders and Knobless Cylinders.
Purpose
The direct aim of the Montessori materials used in this activity focus on the distinction between different dimensions, and challenge the visual and stereognostic skills in children from the age of three to six.
In constructing the Christmas Tree, student’s knowledge of these concepts are challenged, and they are encouraged to refine their senses and intellect, whilst matching together pieces of different Montessori materials.
Indirectly, this Montessori extension builds on foundational fine and gross motor skills, with a strong emphasis on hand-eye coordination. They also prepare for future creative and artistic work as they get creative with material organisation during ‘decorating.’
The Tree: The Red Rods and Pink Tower
- Invite the child to work with you, and guide them to the Sensorial Curriculum area.
- Identify the Red Rods. Show the child how to hold the shortest rod by griping over the top of the centre part of the rod, using your right thumb and fingers. Carry the rod to a large mat.
- Have the child carry the remaining rods one at a time and place them randomly on the mat.
- Next, identify the Pink Tower. Starting at the top, with the smallest cube, pick up one cube at a time, with one hand on top and one hand on underneath. Carry the cubes to the mat and arrange randomly.
- Once all materials are assembled, ask the child to find the longest red rod, and place it in the middle and at the bottom of your mat.
- Next, ask the child to find the largest cube, and place this in the middle, above the largest red rod.
- Continue in this manner (from longest/largest to shortest/smallest) until the ‘tree’ is assembled.
The Decorations: The Knobbed and Knobless Cylinders
- Once the foundation of the Christmas Tree is complete, guide the child to the Sensorial Curriculum area and identify the Knobbed Cylinders. Bring your choice of blocks to the work mat.
- Beginning at the largest cylinder, use a pincer grip and take out each knobbed. Place this cylinder in front of the wooden block.
- Continue to remove each cylinder in the same manner.
- Next, identify the Knobless Cylinders, and bring your choice of sets to the work mat.
- Begin with the thickest cylinder and place it before the Cylinder Box.
- Continue in this manner until all cylinders are removed in order, thickest to thinnest.
- Ask the child to identify the largest and/or widest Knobless Cylinder (depending on your set selection). Place it on the left side of the longest red rod.
- As the child to identify the second largest and/or widest Knobless Cylinder from the same set, and place it on the right side of the second longest red rod.
- Continue on this manner until every Red Rod has a cylinder on alternating sides.
- Choose a second Knobless Cylinder set, and follow the previous instructions, placing these materials on opposite sides to the original cylinders.
- When this is complete, each side of the Red Rods will have a Knobless Cylinder placed on it.
- Now, encourage the children to begin matching Knobbed and Knobless Cylinders together by size, placing them next to the original cylinders.
- Once complete, encourage the child to ‘redecorate’ using their own selection of cylinders. The goal is to ensure that students are challenging their visual perception by matching materials.